Monday, November 3, 2014

Homemade Pumpkin Spice Latte

Just because October is over and the Halloween decor has been put away, it does not mean you can't still enjoy some delicious pumpkin recipes.   Like this one for homemade pumpkin spice lattes. 

When I saw this recipe come up in my Facebook feed I bookmarked it immediately.  I had been searching for an easy, healthy alternative to the (in my humble opinion) over-hyped pumpkin spice latte at a certain coffee shop that shall remain nameless.
As I mentioned above, this recipe is a healthier option since it does not contain any artificial coloring or preservatives.  And, it actually has pumpkin in it, which is a great source of fiber and vitamin A.  Pumpkin in a pumpkin spice latte? Imagine that!
I will say that I think this recipe could be a touch sweeter.  I think the next time I make it, I would do 1/2 cup of maple syrup instead of 1/3 cup or maybe just add some actual sugar.  Also, I would add another tablespoon of pumpkin (so 4 total) and another teaspoon of pumpkin spice.  But, I recommend starting with the original recipe and adjusting per your taste preferences! 
Best thing about this recipe? Long after pumpkin goes out of season at all the coffee chains, you can still sip on these warm flavors year round without ever leaving the house!

Pumpkin Spice Latte
adapted slightly from www.againstallgrain.com

Ingredients:
3/4 cup plain, unsweetened almond milk
3/4 cup unsweetened coconut milk
1/3 cup maple syrup
3 tablespoons canned pumpkin puree
1 teaspoon pumpkin spice
1/2 teaspoon vanilla extract
Directions:
1. Combine all the ingredients in a saucepan over medium-high heat.  Simmer for about 5 minutes, whisking occasionally, until heated through and slightly frothy.
 
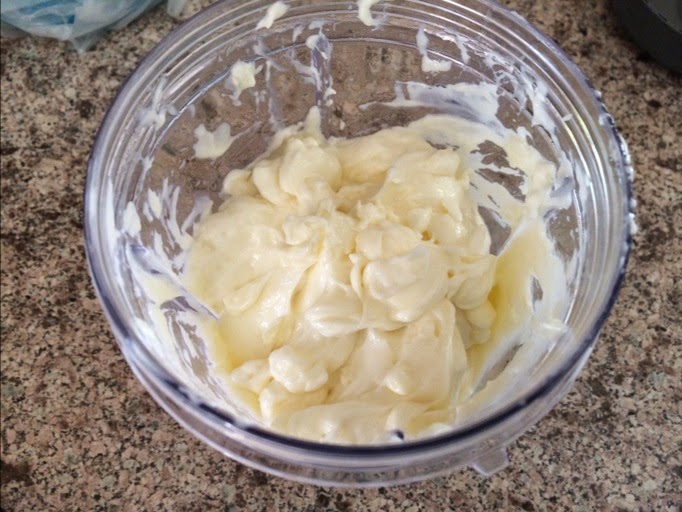
2. Transfer the liquid to a blender.  Blend on high for 30 seconds until the mixture is foamy.  Safety tip: be sure to cover the lid with a towel to prevent splashing of hot liquids!  You can also skip the blender and mix the liquid right in the pot with an immersion blender until foamy (this is the method I did).
 
3.  Spoon into a cup of hot coffee and enjoy!  Allow the remaining mixture to cool and then store in the fridge.  Just give it a quick blend before using it again
 
Need suggestions on what to do with the leftover pumpkin puree? Check out some of the other pumpkin recipes on my blog including Pumpkin-Honey Beer Quick Bread and Gluten-Free Pumpkin Chocolate Chip Cookies, both of which would pair perfectly with a cup of this latte!

Healthfully Yours,

Meghan

Wednesday, October 22, 2014

Homemade Olive Oil Mayo

If you've been following me for a while now, you've probably noticed my recent obsession with homemade mayo.  I think at one point I may have even said I was in love with it!  Well, I still am.  So much in fact that I decided it deserves its own post! 

 
This recipe is so good that you will think twice about ever buying mayo from the store again.  It has such a rich, creamy flavor, with just a touch of tartness.  Dare I say it's decadent? 
You can use homemade mayo for any recipe you would normally use the store-bought stuff in.  Personally I love it for chicken, tuna and egg salads.  I've also used it to make a homemade tartar sauce which is amazingly delicious!  Add a little curry powder to some of the mayo and you have a flavorful topping or dip for potatoes! 
 
I use an immersion blender, because it makes the process super easy.  Trying to make mayo in a food processor takes serious time and patience - both of which I have little of these days!  If you don't have an immersion blender you can follow the food processor instructions posted here.
 
I cannot stress enough how important it is that ALL of the ingredients be at room temperature.  Yes, this includes the egg as well!  If I know I am going to be making a new batch I will take an egg and a lemon out of the fridge early in the day and let them sit on the counter for a few hours.  Trust me - the emulsification process will not happen if you put cold ingredients in!
 
Also, note that the recipe calls for extra light olive oil.  The "extra light" refers to the flavor of the oil. Do not use extra virgin olive oil in this recipe - the flavor is too strong!

Homemade Olive Oil Mayo
adapted slightly from www.theclothesmakethegirl.com

Ingredients:*
1 whole egg
1 1/4 cup extra light olive oil
2 T fresh lemon juice (I usually use 2.5 T or about 1/2 a lemon for extra zip)
1/2 tsp mustard powder
1/2 tsp salt
*Remember ALL ingredients must be at room temperature!!

Instructions:
1. Crack the egg into a tall container.  Be sure the container is wide enough for the immersion blender to fit at the bottom.
2. Add the remaining ingredients.
3. Wait a few minutes to be sure the egg is settled at the bottom.
4. Place the immersion blender into the container and press down.  While staying directly on top of the egg, blend for about 20 seconds.  You should see the ingredients start to cream up.
5. Continue to blend all the ingredients together by moving the immersion blender up and down.  The whole process should take no more than 45 seconds.
6. Keep covered in the fridge for up to one week.  Enjoy!


Healthfully Yours,
Meghan


Friday, October 17, 2014

Pistachio Crusted Fish

I am always looking for new ways to liven up fish. Let's face it - baked with a little EVOO and lemon gets b-o-r-i-n-g after a while! Not to mention, every once in a while I want a little texture, a little crispiness to my fish.  

Enter the nut! The pistachio to be exact. Offering just the right crunch and a little punch of color, ground pistachios add a perfect crust to any white fish. Pistachios are a great source of antioxidants, especially vitamin E. They also provide important minerals such as copper and selenium.

In this recipe, I used swai, because it's what we had on hand, but this would work great with tilapia or halibut as well.  If you are not familiar with swai, it's a white fish that has a mild, sweet flavor with a light, flaky texture. We purchase a domestic brand that is farmed responsibly and certified by the ASC.  A 6oz portion contains around 100 calories and 20 grams of protein! 
This turned out awesome!  The exact texture and flavor I was hoping for and it was so, so easy to make - perfect for those busy weeknight dinners!  This dish pairs well with your traditional vegetable and starch sides, but I also think it would be great served on top of a salad!

Pistachio Crusted Fish

Ingredients:
4 fillets of any mild, white fish
2 T Dijon mustard
2/3 cup shelled pistachios (unsalted)
2 T coconut oil
Salt and pepper to taste

Instructions:
1. Grind the shelled pistachios in a food processor until fine. Spread onto a flat dish.
2. Melt the coconut oil in large skillet over medium-high heat.
3. Brush both sides of the fish with the Dijon mustard.
4. Dredge the fish in the ground pistachios, coating both sides.
5. Cook the fish in the coconut oil for about 6-8 minutes on each side (cooking times will vary based on the thickness of the fillet). Season with salt and pepper while cooking.


Healthfully Yours,

Meghan


Sunday, October 12, 2014

Butternut Squash + Recipe

It seems that as soon as October rolls around, everyone is hit with pumpkin fever.  Now don't get me wrong, I enjoy pumpkin pie, pumpkin lattes, pumpkin bread, pumpkin ice cream and everything else pumpkin as much as the next person, but I prefer a different seasonal squash: the butternut.  Simply put, I adore butternut squash! 

 
Butternut squash is so versatile.  You can roast it, puree it for soups, or use it in breads and casseroles. It's also extremely healthy for you given its jammed packed with nutrients.  Butternut squash is one of the best sources for antioxidants such as Vitamins A, C and E.  Actually, just one serving (1 cup) of butternut squash has close to 3 times the recommended daily intake of Vitamin A!  It's also a good source of minerals like magnesium and potassium.  And let's not forget about that "F" word - fiber!  Butternut squash contains about 10% of the recommended daily intake in each serving, which helps keep you feeling full!  
To be honest, there is one thing about butternut squash that I do not like and that is prepping it!  The thick hard skin and its odd shape make it a pain in the you-know-what to handle! Here are a few tips I've acquired to help you stay safe (and sane) when preparing any winter squash:

1) To prevent slips, make sure your surface area is stable.  An easy trick is to place a damp cloth underneath your cutting board.
2) Trim away the ends first.  This gives you flat sides to prevent the squash from rolling on the cutting board.
3) Use a big, sharp knife to both cut and peel the squash.  A chef's knife with at least an 8in blade is best.  Peeling with a knife instead of a peeler is actually more efficient and safer - just be sure to tuck those fingers!
4) If all else fails, you can bake the squash first at 375 degrees with the peel on for about 10 minutes to soften it.
My favorite way to enjoy butternut squash?  Roasted, by far!  The roasting process creates a carmelization affect that makes the squash even sweeter!  After peeling and cutting the squash into bite sized cubes, toss them in a large bowl with 2 tbsp of extra virgin olive oil and 2 tbsp of balsamic vinegar.  Season with a couple of pinches of kosher salt.  Place in a foil-lined baking pan and put it in the oven at 425 degrees.  Cook for 30-40 minutes tossing half-way through.  Serve it just like that or if you want to jazz it up a little, toss it with some blue cheese! Ridiculously good!
Looking to make butternut squash part of the main course and not just a side dish?  Try this butternut squash stew recipe!  I made it the other day in the slow cooker  and it turned out awesome!  Super hearty and loaded with nutrition!
 
Butternut Squash and Beef Stew
slightly adapted from http://paleoleap.com
(serves 4)

Ingredients: 
1lb beef cubes for stewing;
1 butternut squash, peeled, de-seeded and diced
1 medium onion, diced
3 garlic cloves, minced
4 carrots, diced
6 oz mushrooms, sliced
6 oz spinach, chopped
1 cup chicken stock (I used vegetable stock, because that's what I had)
14 oz can diced tomatoes (I would recommend draining the can for a thicker stew)
2 tbsp chili powder
2 tsp paprika
1 tsp dried oregano
Salt and pepper to taste 

Instructions:
1. Add all the ingredients, except for the spinach and the mushrooms, into the slow cooker.
2. Mix together.  Set the slow cooker to low and cook for 5-7 hours until the meat is cooked fully and the squash is tender.  (It only took about 5 hours in my slow cooker.)
3. Add in the mushrooms about 45 minutes before the stew is done.
4. Add the spinach just before serving.

Do you have a favorite butternut squash recipe?  I'd love to hear it!

Healthfully Yours,

Meghan


Wednesday, October 8, 2014

Crockpot Steak Chili

I love when recipes just come together out of necessity, don't you?  The other day, I had pulled some skirt steaks out of the freezer to thaw, but thanks to a whirlwind of a weekend, didn't get to them for a few days. By Monday I knew I needed to do something with them or they would go bad. Problem is, the hubby was out of town and I knew I sure as heck couldn't put away 1.5lbs of steak by myself. What to do, what to do?


Well, cue the cool, damp, fall weather and my craving for chili kicked in. I scavenged through the fridge and pantry and realized I had everything I needed. Score! Steak chili it was! And being home alone with a 3 month old, I figured why not make it easy on myself and do this one in the crockpot? Slow and low is the best way to develop chili flavors anyways.


This could not have turned out more perfectly! It was hearty and warm and full of rich flavors which is just what you want on a cool autumn evening. Well, that and a nice glass of red!


Crockpot Steak Chili
Ingredients:
1.5lbs of skirt steak, cut into bite size pieces (flank steak would also work)
1 red bell pepper, chopped
2 celery stalks, chopped
1 small white onion, chopped
2 cloves garlic, minced
2 tsp salt
1 tsp ground black pepper
1 T chili powder (more if you like extra spice)
2 tsp paprika
2 tsp cumin


Directions:
1. Combine all the ingredients in the crockpot.
2. Cover and cook on low for 5 hours or until steak is nice and tender. Keep in mind cooking times may vary.
3. Garnish with extra chopped tomatoes, onion, cheese or sour cream. I added extra chopped onion and some avocado on mine!


Healthfully Yours,

Meghan

Friday, October 3, 2014

My Whole30 Wrap Up

When my sister asked me late in August if I would want to do a Whole30 challenge with her starting in September, I immediately said yes, but asked if we could wait until after labor day so I could get my grub on at a cookout.  No need to sabotage yourself with a holiday, right?
 
A typical breakfast of eggs scrambled in ghee with a protein and tons of vegetables. Some roasted potatoes on the side.
 She was actually surprised by the fact that I said yes.  See, being a dietitian I tend to not trust most "fad" diets, especially ones that eliminate whole food groups, but I was at a point of desperation.  I was 2 months post-partum and not feeling good about what I was eating, the way I felt, or the way I looked.  I was not sleeping well, had little energy and my body ached. 
Now, I fully understand that these are all normal feelings after having a baby and we moms don't give ourselves enough slack when it comes to getting back to our pre-pregnancy selves.  But, I knew I was not eating as healthy as I should be and I wanted to try something new.  I also figured from a professional standpoint, it was a good idea to see what all the rage was about and to form my own opinion, so that I could share it when asked.
Balsamic chicken and sausage with roasted butternut squash and steamed broccoli.
First thing I did was buy the Whole30 book It Starts With Food and scour their website.  Like any normal food-loving person, I immediately needed to know what can and can't I eat on this plan?  Well, here's the answer:
IN:  Meat, seafood, eggs, vegetables, fruit, nuts, natural fats (coconut oil, olive oil, avocado, ghee)
OUT: All sugar (yes, even honey), alcohol, grains, legumes, dairy and three preservatives: sulfites, carageenan and MSG
You know what my first thought was...great, I can have coffee!  Wait! What am I going to put in my coffee?? (see below)

BBQ meatballs with roasted spaghetti squash.
By now you're probably asking "Okay so what exactly is the point of the Whole30 challenge?"  The point is that many of the foods we eat trigger hormonal responses in our body that are negative.  I love this quote from the book: "The food that you eat either makes you more healthy or less healthy. Those are your options. There is no neutral."  I have always believed that the food we eat makes us feel a certain way, so this was making sense to me.  This was in fact, why I became a dietitian.  Because, I believe we can heal ourselves (or make ourselves sick) with food. 
So, here are some of the developments and discoveries that happened during my Whole30 challenge:
I lost a total of 10 pounds...I felt less bloated...I had more energy...I tried new foods...I began to enjoy cooking again...I was eating more vegetables...I noticed a lot of my cravings subsided...I could recognize when I was full and when I was hungry....I could drink black coffee and enjoy it...I would not die without cheese...I started running again...I fell in love with homemade mayo
Amazing homemade mayo.
I'm sure what everyone is dying to know is did I cheat?  The answer? Yes, I did cheat a couple of times.  I had 3 glasses of wine over the course of the 30 days.  On day 29 I had a bite of some delicious bread and after dinner on day 30 I had a few spoonfuls of ice cream!  I know, I know, I'm going to hell! No, but seriously, it is kind of sad that I couldn't go 30 days without cheating.  But, I don't dwell on it, because I really feel great!

Turkey burger topped with homemade mayo and garden tomato with tomato and avocado salad
 and a side of sautéed spinach and bacon.
So, there you have it: my Whole30 wrap-up!  Would I do it again? Absolutely!  Is there anything I am going to continue to eliminate from my diet? I don't think so, but I do want to keep grains, dairy and sugar to a minimum.
Healthfully Yours,

Meghan


Monday, September 29, 2014

Java Jive

Mmmmm coffee! Java. Cup of joe. No matter what you call it, you've got to love it!  And no matter how you take it: black or con leche, it just doesn't seem right to start your day off without it.  Or for some of us, to have a cup constantly by your side like a loyal companion.  Yes, I love coffee first thing in the morning with breakfast or on my commute into work (before I worked from home).  I love coffee in the middle of the afternoon whether working, reading a book or just stalking people on facebook.  And I love coffee at night after a satisfying meal, along with a little something sweet of course. 
You can call me an addict, but I'm fine with that, because coffee is good for you!  Yes, there are those pesky haters that say coffee is a bad for your health, but to them I say: psshhht!  Here are three reasons why coffee drinking is all-good.
1. Improved Cognitive Function: Many human studies have shown that caffeine helps to improve aspects of cognition such as memory and reactions times. How? Caffeine causes the amounts of the neurotransmitters norepinephrine and dopamine to increase, leading to enhanced firing of neurons.
2. Natural Laxative: Okay, sorry if this is TMI, but it's true!  Coffee makes you poop and therefore can help keep your digestive system regular.  That's the reason why it is traditionally always offered after a meal (you learn something new every day).
3. Contains Antioxidants: Antioxidants are protective of things like cardiovascular disease, cancer and diabetes.  In the Western diet, coffee is the main source of antioxidants!  Studies have shown that people get more antioxidants from coffee than from fruits and veggies combined.  Sad, but true!  
So there you have it! Straight from the dietitian's mouth, go grab yourself a cup of joe!  Just do me a favor and skip all the whipped cream, syrups and sprinkles that will negate all its healthy properties!

Healthfully Yours,

Meghan