Monday, November 3, 2014

Homemade Pumpkin Spice Latte

Just because October is over and the Halloween decor has been put away, it does not mean you can't still enjoy some delicious pumpkin recipes.   Like this one for homemade pumpkin spice lattes. 

When I saw this recipe come up in my Facebook feed I bookmarked it immediately.  I had been searching for an easy, healthy alternative to the (in my humble opinion) over-hyped pumpkin spice latte at a certain coffee shop that shall remain nameless.
As I mentioned above, this recipe is a healthier option since it does not contain any artificial coloring or preservatives.  And, it actually has pumpkin in it, which is a great source of fiber and vitamin A.  Pumpkin in a pumpkin spice latte? Imagine that!
I will say that I think this recipe could be a touch sweeter.  I think the next time I make it, I would do 1/2 cup of maple syrup instead of 1/3 cup or maybe just add some actual sugar.  Also, I would add another tablespoon of pumpkin (so 4 total) and another teaspoon of pumpkin spice.  But, I recommend starting with the original recipe and adjusting per your taste preferences! 
Best thing about this recipe? Long after pumpkin goes out of season at all the coffee chains, you can still sip on these warm flavors year round without ever leaving the house!

Pumpkin Spice Latte
adapted slightly from www.againstallgrain.com

Ingredients:
3/4 cup plain, unsweetened almond milk
3/4 cup unsweetened coconut milk
1/3 cup maple syrup
3 tablespoons canned pumpkin puree
1 teaspoon pumpkin spice
1/2 teaspoon vanilla extract
Directions:
1. Combine all the ingredients in a saucepan over medium-high heat.  Simmer for about 5 minutes, whisking occasionally, until heated through and slightly frothy.
 
2. Transfer the liquid to a blender.  Blend on high for 30 seconds until the mixture is foamy.  Safety tip: be sure to cover the lid with a towel to prevent splashing of hot liquids!  You can also skip the blender and mix the liquid right in the pot with an immersion blender until foamy (this is the method I did).
 
3.  Spoon into a cup of hot coffee and enjoy!  Allow the remaining mixture to cool and then store in the fridge.  Just give it a quick blend before using it again
 
Need suggestions on what to do with the leftover pumpkin puree? Check out some of the other pumpkin recipes on my blog including Pumpkin-Honey Beer Quick Bread and Gluten-Free Pumpkin Chocolate Chip Cookies, both of which would pair perfectly with a cup of this latte!

Healthfully Yours,

Meghan

Wednesday, October 22, 2014

Homemade Olive Oil Mayo

If you've been following me for a while now, you've probably noticed my recent obsession with homemade mayo.  I think at one point I may have even said I was in love with it!  Well, I still am.  So much in fact that I decided it deserves its own post! 

 
This recipe is so good that you will think twice about ever buying mayo from the store again.  It has such a rich, creamy flavor, with just a touch of tartness.  Dare I say it's decadent? 
You can use homemade mayo for any recipe you would normally use the store-bought stuff in.  Personally I love it for chicken, tuna and egg salads.  I've also used it to make a homemade tartar sauce which is amazingly delicious!  Add a little curry powder to some of the mayo and you have a flavorful topping or dip for potatoes! 
 
I use an immersion blender, because it makes the process super easy.  Trying to make mayo in a food processor takes serious time and patience - both of which I have little of these days!  If you don't have an immersion blender you can follow the food processor instructions posted here.
 
I cannot stress enough how important it is that ALL of the ingredients be at room temperature.  Yes, this includes the egg as well!  If I know I am going to be making a new batch I will take an egg and a lemon out of the fridge early in the day and let them sit on the counter for a few hours.  Trust me - the emulsification process will not happen if you put cold ingredients in!
 
Also, note that the recipe calls for extra light olive oil.  The "extra light" refers to the flavor of the oil. Do not use extra virgin olive oil in this recipe - the flavor is too strong!

Homemade Olive Oil Mayo
adapted slightly from www.theclothesmakethegirl.com

Ingredients:*
1 whole egg
1 1/4 cup extra light olive oil
2 T fresh lemon juice (I usually use 2.5 T or about 1/2 a lemon for extra zip)
1/2 tsp mustard powder
1/2 tsp salt
*Remember ALL ingredients must be at room temperature!!

Instructions:
1. Crack the egg into a tall container.  Be sure the container is wide enough for the immersion blender to fit at the bottom.
2. Add the remaining ingredients.
3. Wait a few minutes to be sure the egg is settled at the bottom.
4. Place the immersion blender into the container and press down.  While staying directly on top of the egg, blend for about 20 seconds.  You should see the ingredients start to cream up.
5. Continue to blend all the ingredients together by moving the immersion blender up and down.  The whole process should take no more than 45 seconds.
6. Keep covered in the fridge for up to one week.  Enjoy!


Healthfully Yours,
Meghan


Friday, October 17, 2014

Pistachio Crusted Fish

I am always looking for new ways to liven up fish. Let's face it - baked with a little EVOO and lemon gets b-o-r-i-n-g after a while! Not to mention, every once in a while I want a little texture, a little crispiness to my fish.  

Enter the nut! The pistachio to be exact. Offering just the right crunch and a little punch of color, ground pistachios add a perfect crust to any white fish. Pistachios are a great source of antioxidants, especially vitamin E. They also provide important minerals such as copper and selenium.

In this recipe, I used swai, because it's what we had on hand, but this would work great with tilapia or halibut as well.  If you are not familiar with swai, it's a white fish that has a mild, sweet flavor with a light, flaky texture. We purchase a domestic brand that is farmed responsibly and certified by the ASC.  A 6oz portion contains around 100 calories and 20 grams of protein! 
This turned out awesome!  The exact texture and flavor I was hoping for and it was so, so easy to make - perfect for those busy weeknight dinners!  This dish pairs well with your traditional vegetable and starch sides, but I also think it would be great served on top of a salad!

Pistachio Crusted Fish

Ingredients:
4 fillets of any mild, white fish
2 T Dijon mustard
2/3 cup shelled pistachios (unsalted)
2 T coconut oil
Salt and pepper to taste

Instructions:
1. Grind the shelled pistachios in a food processor until fine. Spread onto a flat dish.
2. Melt the coconut oil in large skillet over medium-high heat.
3. Brush both sides of the fish with the Dijon mustard.
4. Dredge the fish in the ground pistachios, coating both sides.
5. Cook the fish in the coconut oil for about 6-8 minutes on each side (cooking times will vary based on the thickness of the fillet). Season with salt and pepper while cooking.


Healthfully Yours,

Meghan


Sunday, October 12, 2014

Butternut Squash + Recipe

It seems that as soon as October rolls around, everyone is hit with pumpkin fever.  Now don't get me wrong, I enjoy pumpkin pie, pumpkin lattes, pumpkin bread, pumpkin ice cream and everything else pumpkin as much as the next person, but I prefer a different seasonal squash: the butternut.  Simply put, I adore butternut squash! 

 
Butternut squash is so versatile.  You can roast it, puree it for soups, or use it in breads and casseroles. It's also extremely healthy for you given its jammed packed with nutrients.  Butternut squash is one of the best sources for antioxidants such as Vitamins A, C and E.  Actually, just one serving (1 cup) of butternut squash has close to 3 times the recommended daily intake of Vitamin A!  It's also a good source of minerals like magnesium and potassium.  And let's not forget about that "F" word - fiber!  Butternut squash contains about 10% of the recommended daily intake in each serving, which helps keep you feeling full!  
To be honest, there is one thing about butternut squash that I do not like and that is prepping it!  The thick hard skin and its odd shape make it a pain in the you-know-what to handle! Here are a few tips I've acquired to help you stay safe (and sane) when preparing any winter squash:

1) To prevent slips, make sure your surface area is stable.  An easy trick is to place a damp cloth underneath your cutting board.
2) Trim away the ends first.  This gives you flat sides to prevent the squash from rolling on the cutting board.
3) Use a big, sharp knife to both cut and peel the squash.  A chef's knife with at least an 8in blade is best.  Peeling with a knife instead of a peeler is actually more efficient and safer - just be sure to tuck those fingers!
4) If all else fails, you can bake the squash first at 375 degrees with the peel on for about 10 minutes to soften it.
My favorite way to enjoy butternut squash?  Roasted, by far!  The roasting process creates a carmelization affect that makes the squash even sweeter!  After peeling and cutting the squash into bite sized cubes, toss them in a large bowl with 2 tbsp of extra virgin olive oil and 2 tbsp of balsamic vinegar.  Season with a couple of pinches of kosher salt.  Place in a foil-lined baking pan and put it in the oven at 425 degrees.  Cook for 30-40 minutes tossing half-way through.  Serve it just like that or if you want to jazz it up a little, toss it with some blue cheese! Ridiculously good!
Looking to make butternut squash part of the main course and not just a side dish?  Try this butternut squash stew recipe!  I made it the other day in the slow cooker  and it turned out awesome!  Super hearty and loaded with nutrition!
 
Butternut Squash and Beef Stew
slightly adapted from http://paleoleap.com
(serves 4)

Ingredients: 
1lb beef cubes for stewing;
1 butternut squash, peeled, de-seeded and diced
1 medium onion, diced
3 garlic cloves, minced
4 carrots, diced
6 oz mushrooms, sliced
6 oz spinach, chopped
1 cup chicken stock (I used vegetable stock, because that's what I had)
14 oz can diced tomatoes (I would recommend draining the can for a thicker stew)
2 tbsp chili powder
2 tsp paprika
1 tsp dried oregano
Salt and pepper to taste 

Instructions:
1. Add all the ingredients, except for the spinach and the mushrooms, into the slow cooker.
2. Mix together.  Set the slow cooker to low and cook for 5-7 hours until the meat is cooked fully and the squash is tender.  (It only took about 5 hours in my slow cooker.)
3. Add in the mushrooms about 45 minutes before the stew is done.
4. Add the spinach just before serving.

Do you have a favorite butternut squash recipe?  I'd love to hear it!

Healthfully Yours,

Meghan


Wednesday, October 8, 2014

Crockpot Steak Chili

I love when recipes just come together out of necessity, don't you?  The other day, I had pulled some skirt steaks out of the freezer to thaw, but thanks to a whirlwind of a weekend, didn't get to them for a few days. By Monday I knew I needed to do something with them or they would go bad. Problem is, the hubby was out of town and I knew I sure as heck couldn't put away 1.5lbs of steak by myself. What to do, what to do?


Well, cue the cool, damp, fall weather and my craving for chili kicked in. I scavenged through the fridge and pantry and realized I had everything I needed. Score! Steak chili it was! And being home alone with a 3 month old, I figured why not make it easy on myself and do this one in the crockpot? Slow and low is the best way to develop chili flavors anyways.


This could not have turned out more perfectly! It was hearty and warm and full of rich flavors which is just what you want on a cool autumn evening. Well, that and a nice glass of red!


Crockpot Steak Chili
Ingredients:
1.5lbs of skirt steak, cut into bite size pieces (flank steak would also work)
1 red bell pepper, chopped
2 celery stalks, chopped
1 small white onion, chopped
2 cloves garlic, minced
2 tsp salt
1 tsp ground black pepper
1 T chili powder (more if you like extra spice)
2 tsp paprika
2 tsp cumin


Directions:
1. Combine all the ingredients in the crockpot.
2. Cover and cook on low for 5 hours or until steak is nice and tender. Keep in mind cooking times may vary.
3. Garnish with extra chopped tomatoes, onion, cheese or sour cream. I added extra chopped onion and some avocado on mine!


Healthfully Yours,

Meghan

Friday, October 3, 2014

My Whole30 Wrap Up

When my sister asked me late in August if I would want to do a Whole30 challenge with her starting in September, I immediately said yes, but asked if we could wait until after labor day so I could get my grub on at a cookout.  No need to sabotage yourself with a holiday, right?
 
A typical breakfast of eggs scrambled in ghee with a protein and tons of vegetables. Some roasted potatoes on the side.
 She was actually surprised by the fact that I said yes.  See, being a dietitian I tend to not trust most "fad" diets, especially ones that eliminate whole food groups, but I was at a point of desperation.  I was 2 months post-partum and not feeling good about what I was eating, the way I felt, or the way I looked.  I was not sleeping well, had little energy and my body ached. 
Now, I fully understand that these are all normal feelings after having a baby and we moms don't give ourselves enough slack when it comes to getting back to our pre-pregnancy selves.  But, I knew I was not eating as healthy as I should be and I wanted to try something new.  I also figured from a professional standpoint, it was a good idea to see what all the rage was about and to form my own opinion, so that I could share it when asked.
Balsamic chicken and sausage with roasted butternut squash and steamed broccoli.
First thing I did was buy the Whole30 book It Starts With Food and scour their website.  Like any normal food-loving person, I immediately needed to know what can and can't I eat on this plan?  Well, here's the answer:
IN:  Meat, seafood, eggs, vegetables, fruit, nuts, natural fats (coconut oil, olive oil, avocado, ghee)
OUT: All sugar (yes, even honey), alcohol, grains, legumes, dairy and three preservatives: sulfites, carageenan and MSG
You know what my first thought was...great, I can have coffee!  Wait! What am I going to put in my coffee?? (see below)

BBQ meatballs with roasted spaghetti squash.
By now you're probably asking "Okay so what exactly is the point of the Whole30 challenge?"  The point is that many of the foods we eat trigger hormonal responses in our body that are negative.  I love this quote from the book: "The food that you eat either makes you more healthy or less healthy. Those are your options. There is no neutral."  I have always believed that the food we eat makes us feel a certain way, so this was making sense to me.  This was in fact, why I became a dietitian.  Because, I believe we can heal ourselves (or make ourselves sick) with food. 
So, here are some of the developments and discoveries that happened during my Whole30 challenge:
I lost a total of 10 pounds...I felt less bloated...I had more energy...I tried new foods...I began to enjoy cooking again...I was eating more vegetables...I noticed a lot of my cravings subsided...I could recognize when I was full and when I was hungry....I could drink black coffee and enjoy it...I would not die without cheese...I started running again...I fell in love with homemade mayo
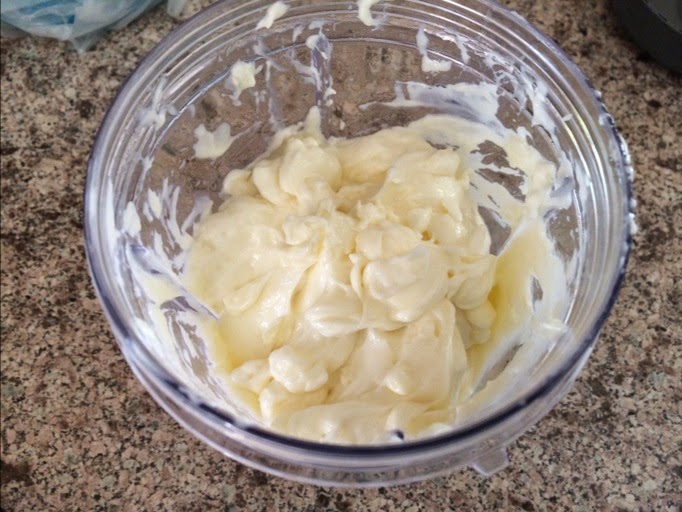
Amazing homemade mayo.
I'm sure what everyone is dying to know is did I cheat?  The answer? Yes, I did cheat a couple of times.  I had 3 glasses of wine over the course of the 30 days.  On day 29 I had a bite of some delicious bread and after dinner on day 30 I had a few spoonfuls of ice cream!  I know, I know, I'm going to hell! No, but seriously, it is kind of sad that I couldn't go 30 days without cheating.  But, I don't dwell on it, because I really feel great!

Turkey burger topped with homemade mayo and garden tomato with tomato and avocado salad
 and a side of sautéed spinach and bacon.
So, there you have it: my Whole30 wrap-up!  Would I do it again? Absolutely!  Is there anything I am going to continue to eliminate from my diet? I don't think so, but I do want to keep grains, dairy and sugar to a minimum.
Healthfully Yours,

Meghan


Monday, September 29, 2014

Java Jive

Mmmmm coffee! Java. Cup of joe. No matter what you call it, you've got to love it!  And no matter how you take it: black or con leche, it just doesn't seem right to start your day off without it.  Or for some of us, to have a cup constantly by your side like a loyal companion.  Yes, I love coffee first thing in the morning with breakfast or on my commute into work (before I worked from home).  I love coffee in the middle of the afternoon whether working, reading a book or just stalking people on facebook.  And I love coffee at night after a satisfying meal, along with a little something sweet of course. 
You can call me an addict, but I'm fine with that, because coffee is good for you!  Yes, there are those pesky haters that say coffee is a bad for your health, but to them I say: psshhht!  Here are three reasons why coffee drinking is all-good.
1. Improved Cognitive Function: Many human studies have shown that caffeine helps to improve aspects of cognition such as memory and reactions times. How? Caffeine causes the amounts of the neurotransmitters norepinephrine and dopamine to increase, leading to enhanced firing of neurons.
2. Natural Laxative: Okay, sorry if this is TMI, but it's true!  Coffee makes you poop and therefore can help keep your digestive system regular.  That's the reason why it is traditionally always offered after a meal (you learn something new every day).
3. Contains Antioxidants: Antioxidants are protective of things like cardiovascular disease, cancer and diabetes.  In the Western diet, coffee is the main source of antioxidants!  Studies have shown that people get more antioxidants from coffee than from fruits and veggies combined.  Sad, but true!  
So there you have it! Straight from the dietitian's mouth, go grab yourself a cup of joe!  Just do me a favor and skip all the whipped cream, syrups and sprinkles that will negate all its healthy properties!

Healthfully Yours,

Meghan 

Tuesday, February 25, 2014

O'Mazing Omega-3's

People are constantly being told by doctors and yes, dietitians, “Limit this food or avoid that food because they're bad for you.”  Well, I for one, would rather spend time focusing on the things we should be eating more of!  Have you heard of omega-3's and their health benefits?  In honor of American Heart Month, let's explore these healthy fats: what exactly are they and how can we eat more of them?
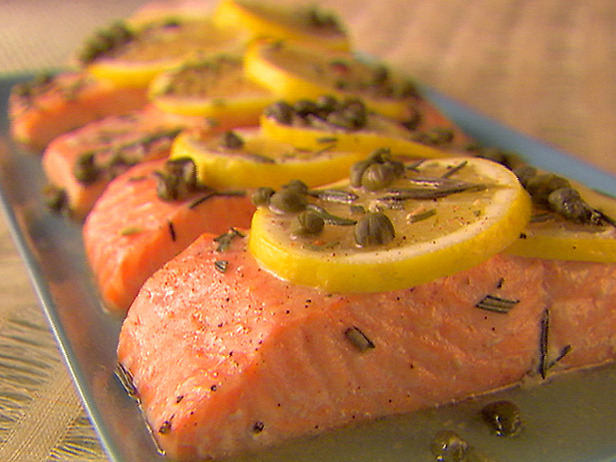
salmon 2
More and more research is supporting the important role that omega- 3's play in reducing the risk of heart disease including heart attack and stroke. In fact, the American Heart Association's Dietary Guidelines suggest that increasing our consumption of these fats can help prevent cardiovascular disease, specifically by lowering serum triglyceride and blood pressure levels.  Plain and simple, omega-3's are good for the heart!
Omega-3's are a type of essential polyunsaturated fat.  Essential means that the body needs them for basic functions, but cannot make them, and therefore must be consumed in the diet. There are three types of omega-3's:
      1. ALA (alpha-linolenic acid)
      2. DHA (docosahexaenoic acid)
      3. EPA (eicosapentaenoic acid)
There are two main dietary sources of omega-3's: fish and seeds and nuts.  Fatty fish such as salmon, albacore tuna, mackerel and sardines contain high levels of EPA and DHA.  Walnuts, chia seeds and ground flaxseed are excellent sources of ALA.  ALA can also be obtained from canola, walnut, soybean and flaxseed oils.  Additionally, there are now many products being fortified with omega-3's such as eggs and yogurt.  And for those who don't care for fish or are vegetarian, there are always supplements available.

To reduce the risk of heart disease, the American Heart Association recommends consuming 2 serving of fatty fish (8 oz total) per week or 1 gram of omega-3's per day.  As a reference, 1 tablespoon of chia seeds or ground flaxseed has about 2 grams, 1 ounce of salmon has about 0.75 grams, and 1 teaspoon of canola oil has about 0.5 grams.
Unsure of how to add more omega-3's to your diet?  Try adding a handful of walnuts to your oatmeal or a tablespoon of ground flaxseed to your smoothie in the morning.  Replace two of your usual meat dinners with salmon or another fatty fish.  You could also make your own salad dressing using walnut oil!  Keep in mind that both flaxseed oil and walnut oil are heat sensitive and not meant to be
cooked with.
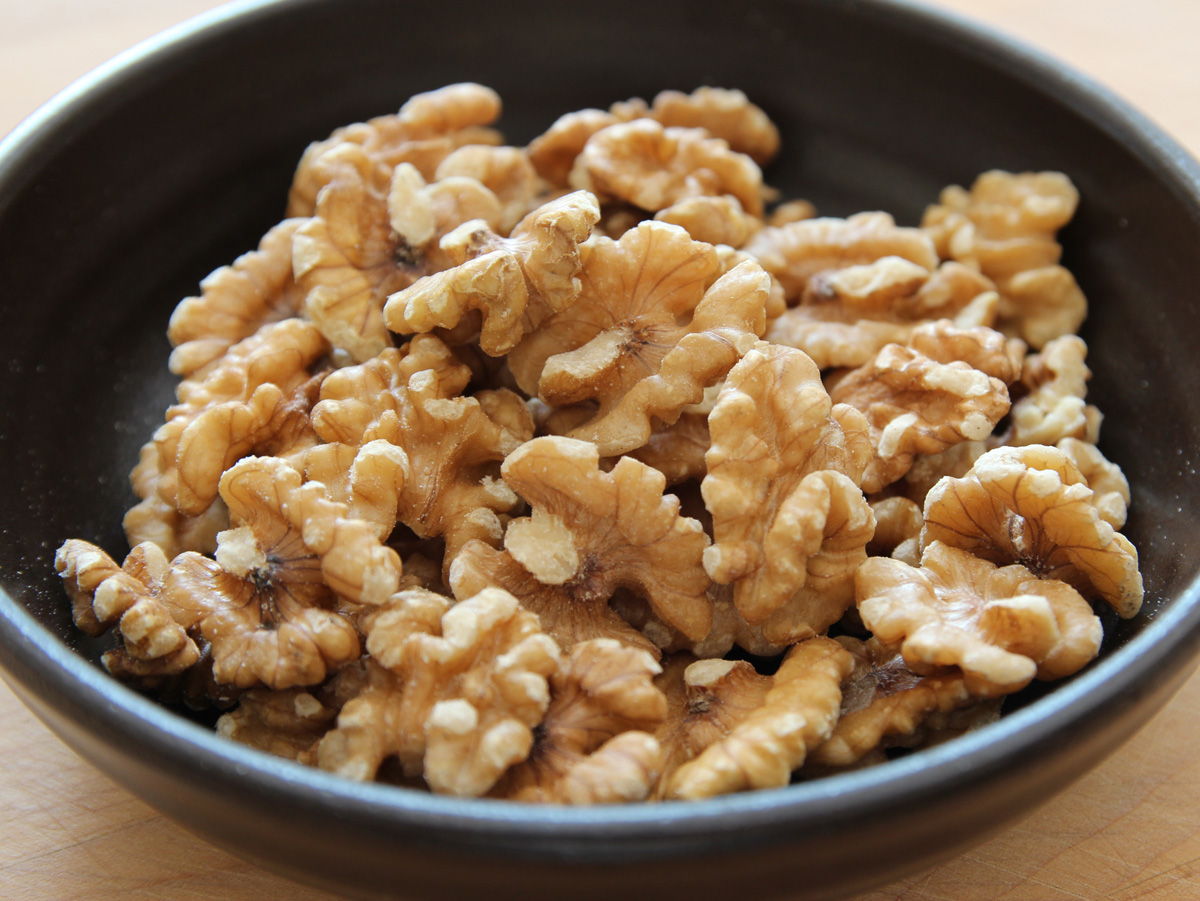
walnuts1

For more information on the benefits of omega-3's check out www.eatright.org or www.heart.org.

Healthfully Yours,

Meghan

Friday, November 8, 2013

November is National Diabetes Month


November is National Diabetes Month, a public health campaign that works to bring awareness to diabetes and to encourage action towards its prevention and management. According to the American Diabetes Association nearly 26 million children and adults in the United States alone currently have diabetes and another 79 million Americans have pre-diabetes or are at risk of developing type 2 diabetes. To put it another way, one in every four Americans either currently has or is at risk for diabetes!
 
What is Diabetes?
A lot of people know that diabetes has to do with sugar but they don't fully understand the disease. Diabetes occurs when your body is unable to convert the sugar (glucose) you consume into energy and so it builds up in your blood. This is known as high blood sugar or hyperglycemia. The chart below shows normal blood glucose levels for those with and without diabetes. Hyperglycemia is when your blood sugar is higher than these guidelines.
 

High blood sugar or hyperglycemia happens for a couple of reasons that have to do with insulin production. Insulin is a hormone that the pancreas produces and is a necessary tool for your cells to use the glucose you consume for energy. When you are insulin resistant, the cells do not “recognize” the insulin your body is making and so the glucose stays in your bloodstream. Another reason for hyperglycemia is that your pancreas can't produce insulin at all. This is the case with type 1 diabetics, although most type 2 diabetics eventually stop producing insulin as well.
 
How is Diabetes Managed?
For those who have diabetes, managing the disease means taking measures to control your blood glucose levels so that they stay in a healthy range. This is extremely important as complications of poorly-managed diabetes can include blindness, kidney failure, poor wound healing and even stroke or heart attack.
 
The three most important elements of diabetes management include self blood glucose monitoring (i.e. checking your blood sugars), diet and medications. Diabetics are encouraged to check their blood sugars several times a day in order to know if they are in the healthy range. Since the glucose in our blood comes from the food we eat, diet is a pivotal part of managing diabetes. Carbohydrates which include grains, fruit and sweets should be limited in the diet in order to keep blood glucose levels from spiking. And finally, medications including pills and insulin injections, work in different capacities to help keep blood glucose levels within a healthy range.

How Can I Prevent Diabetes?
Being overweight and having a family history are two strong risk factors for developing type 2 diabetes. If you think you may be at risk, talk with your doctor, a registered dietitian, a certified diabetes educator or any health care professional about prevention. You can also check out these great resources for more information:


http://ndep.nih.gov/index.aspx

http://www.eatright.org/Public/


Healthfully Yours,
Meghan

Wednesday, October 2, 2013

Pumpkin-Honey Beer Quick Bread


I don't really consider myself a baker, but I do enjoy making quick breads. I'm embarrassed to admit it, but the idea of yeast and proofing and punching and kneading really intimidates me!  Quick breads allow you to skip all that; just a little mixing and you're ready for the oven!

Now, I've made banana breads, Irish soda breads and zucchini breads many times before, but never a pumpkin bread. And in case you didn't notice, pumpkin is the hot seasonal item right now! It's a great source of fiber and beta-carotene, an antioxidant, and provides moisture to baked goods. So when I came across this gem of a recipe for a Pumpkin-Honey Beer Quick Bread, I was super excited!

I knew that this bread was going to be awesome when the house filled with the warmth of pumpkin and honey while it was baking...I mean, the house smelled like autumn! And I was not disappointed - this bread was AMAZING! It is a delicious little fall treat and would be perfect paired with a pumpkin spice latte!


Pumpkin-Honey Beer Quick Bread
adapted from Cooking Light Magazine
makes 1 loaf
 
Ingredients
  • 7.3 ounces 100% whole-wheat flour (about 1 2/3 cups)
  • 1 teaspoons salt
  • 1 teaspoons baking soda  
  • 1/2 teaspoon baking powder
  • 1/2 teaspoon ground cinnamon
  • 1/2 teaspoon pumpkin pie spice
  • 1/4 cup water
  • 1/6 ground flaxseed
  • 1/2 cup granulated sugar
  • 1/4 cup honey
  • 1/3 cup organic unrefined coconut oil (see my post on oils)
  • 1/3 cup room-temperature honey beer (I used Leinenkugel's Honey Weiss)
  • 2 large eggs
  • 1 (8-ounce) can pumpkin
Preparation
  1. Preheat oven to 350°.
  2. Weigh or lightly spoon flour into dry measuring cups; level with a knife. Combine flour, salt, and next 4 ingredients (through pumpkin pie spice) in a medium bowl; stir with a whisk.
  3. Combine 1/4 cup water and flaxseed. Set aside to let thicken.
  4. Place sugar and next 4 ingredients (through eggs) in a large bowl; beat with a mixer at medium-high speed until well blended. Add flaxseed mixture and pumpkin; beat at low speed just until blended. Add flour mixture; beat just until combined.
  5. Pour batter into a greased loaf pan. Bake at 350° for about 50-60 minutes or until a wooden pick inserted in center comes out clean. Cool 10 minutes in pan on a wire rack; remove from pan. Cool completely on wire rack.
  6. Enjoy!
Healthfully Yours,
Meghan

Monday, September 16, 2013

The Ins and Outs of Oils


Oils, or fats, are an important part of cooking: acting as a source of heat transfer, aiding in solubility and emulsification as well as adding flavors and textures to our foods. But deciding on the right cooking oil can be confusing, especially now that there are so many to choose from. The other day at the grocery store I counted about 15 different types of oils, not to mention all the different varieties and brands! Which ones are the healthiest? What do all these descriptions mean? What do they taste like? Can I use it to sauté, stir-fry or bake with?
 
For me, there are three key things to keep in mind when choosing a cooking oil or other fat. First, what kind of fat is it mainly comprised of? Second, how is it processed? And third, what am I going to use it for? Hopefully, this information will help to sort some of that out.

Remember, all oils are fats, but not all fats are the same. There are four main types of fats:
  1. Saturated – Chemically, saturated fatty acids contain the maximum number of hydrogen atoms. Most animal or tropical plant derived oils are saturated fats. Their relationship to cardiovascular disease and other health issues is an ongoing topic of research and debate. (ex: butter, lard, coconut oil)
  2. Polyunsaturated – Fatty acids that lack four or more hydrogen atoms and have two or more double bonds. There are two types of essential polyunsaturated oils:
    a. Omega-3's: anti-inflammatory, heart protective (good) (ex: flax seed oil, walnut oil)
    b. Omega-6's: pro-inflammatory (not so good) (ex: corn oil, canola oil)
  3. Monounsaturated – Fatty acids that lack two hydrogen atoms and have one double bond. (ex: olive oil, canola oil)
  4. Trans Fat – Fatty acids with hydrogen on opposite sides of the double bond. They behave similar to saturated fats when consumed. Trans fats are bad for your health and should be avoided. (ex: any oil that is hydrogenated/partially hydrogenated)
Below are some descriptions commonly seen on a container of oil, most of which refer to the way they were made:
  1. Refined vs. Unrefined - Most oils produced on a large scale, such as canola, are refined. Refined basically means processed involving the use of heat and chemicals. As a general rule, more refining leads to less flavor, less color and most likely, less health benefits.  Unrefined then means unprocessed, or in the purest form.
  2. Light – Refers to color and taste only (not calories or fat content). Like every other oil, light oil is 100% fat.
  3. Cold-pressed/Extra Virgin - The oil is extracted by mechanical pressing only. There’s little or no heat used to extract more oil. After it’s pressed the oil just needs to be filtered, so it tends to keep its natural flavor. You can usually tell a cold-pressed oil by its deep color and stronger flavor (and higher price)!
  4. Expeller-expressedThe oil is obtained by squeezing at high-pressure, which generates heat. Remember that heating an oil during processing can destroy some of it's properties including health benefits.
Based on their healthfulness, here are some oils/fats that I recommend using:
    Extra-Virgin Olive Oil (EVOO) – Rich in flavor and aroma, EVOO is excellent for cooking, using in marinades and in salad dressings. Mainly a monounsaturated fat, it is fairly low in those pro-inflammatory omega-6's. EVOO is high in flavonoids, a type of antioxidant that enhances our immune system and aids in the prevention of cancer and cardiovascular disease.
     
    Coconut Oil (unrefined, organic) – Coconut oil is high in a “good” saturated fat, lauric acid, and is low in omega-6 fatty acids. It's also very versatile: great for baking and cooking at high temperatures. Keep in mind it does have a strong flavor profile, which may not be suited for all recipes. Avoid hydrogenated versions, which contain trans fats.
     
    Flax Seed Oil - Flax seed oil is high in omega-3's, which are good for us! Flax seed oil is heat sensitive and is better suited for use in dressings than it is for cooking. Make sure to store flax seed oil in the refrigerator.
     
    Butter (grass-fed) - Yes, butter! True butter is a saturated fat, but grass-fed is high in conjugated linoleic acid (CLA) which have some possible health benefits including fat loss and the treatment of some cancers. It's also low in omega-6's. Use butter in baking or sautéing. Butter is pure, not processed, and should be purchased from organic sources.
 
Oils and fats to use sparingly or avoid altogether:
    Soybean and Corn Oil - Both oils are very high in omega-6's. They are almost always highly processed (i.e. refined, bleached, deodorized) and unless organic, are derived from genetically modified crops.
     
    Palm Oil – Palm oil is very high in omega-6's and is especially of concern due to it's environmental implications. Palm oil cultivation has led to the destruction of rain forests, greenhouse admissions and reduced biodiversity in many countries. For more information on palm oil and the environment, check out this news article from the New York Times.
     
    Margarine – Margarine is highly processed and contains hydrogenated oils, or trans fats. You are better off using grass-fed butter.


Healthfully Yours,
Meghan

Monday, August 19, 2013

Utilizing the Nutrition Facts Panel


Recently, a good friend asked me about nutrition labels and wanted to know “how much sodium is considered a lot?” Now I'm pretty certain she is not the first person to look at a package's label and wonder if it's a good choice or not. Just walk down the aisles of the grocery store and I guarantee you will find plenty of people staring blankly at the back of packages, not sure what it all means! Whether you are looking to lose weight, are a diabetic or just want to eat better, the Nutrition Facts Panel (nutrition label) can be a great tool, but only if you know how to use it!

But First, A Brief History...

What we commonly refer to as a nutrition label is technically called the Nutrition Facts Panel. It first appeared on packaged foods in 1992, the first label to show per serving nutrition information. The nutrients listed in the panel were chosen because of their importance to modern health.  In other words, the nutrients Americans consume too much of and those we tend to be deficient in. As new concerns come to light, the required nutrients of the panel will be changed (i.e. trans fat).
The Nutrition Facts Panel is required on all packaged items except fresh fruits and vegetables and food served for immediate consumption such as those served at delis, in hospitals or on airplanes. Only recently (March 2012), did the Nutrition Facts Panel become required on packages of raw meat.

And Finally, Your Cheat Sheet...

Serving Size & Servings Per Container
The first and foremost thing you should check on a label! Remember that a package might contain more than one serving. If the serving size is listed as ½ cup and you eat 1 cup, you need to double the amount of calories, sugar, etc.
Calories and Calories From Fat
Knowing how many calories you consume can be helpful for weight management. A single serving that contains 40 calories or less is considered low and 400 or more is considered high. Try to keep the calories from fat < 30%.

Total Fat
This includes both saturated and unsaturated fats. A serving that contains 3 grams or less of total fat is considered low fat. Keep in mind, unsaturated fats are not a required component of the label. Most manufacturers will only list it if the product is high in them and they want to promote it!

Saturated Fat
Keep saturated fat intake at < 10% of total calories per day. This equates to approximately 22 grams a day on a 2000 calorie diet.

Trans Fat
Trans fat should be avoided at all costs, so look for items that have 0 grams per serving. Of note, items that actually contain 0.5 grams or less can be listed as 0. Sneaky right? You can find hidden trans fat in the ingredient list as partially hydrogenated oils.

Cholesterol
The recommended intake for cholesterol is 300 milligrams per day. Less than 20 mg per serving is considered low.

Sodium
The recommended intake for most healthy adults is less than 2400 milligrams per day. A low sodium food has < 140 mg per serving and > 400 mg per serving is considered high. If you are on a sodium restricted diet, > 300 mg is high.

Carbohydrates
Total carbohydrates includes both sugar and fiber. Although what's considered to be “low-carb” diet varies, on average, 100 grams or less per day could be considered “low-carb”. Diabetics should look to consume around 45-60 grams per meal and 15 grams per snack.

Fiber
Adults need 30-35grams of fiber each day. Most Americans consume only 1/3 of that! Aim for > 3 grams per serving.

Sugar
Look for items with < 10 grams per serving. If you are concerned about added, processed sugars (you should be), check the ingredients list for things like agave nectar, cane crystal, crystalline fructose, dextrose, evaporated cane juice, fructose, fruit juice concentrates, glucose, molasses, raw sugar, and sucrose and any syrup.

Daily Values
The percent of daily value (DV) is based on a general 2000 calorie per day diet. Any DV less than 5% is low – aim for low in total fat, saturated fat, trans fat and cholesterol. A DV of 20% and greater is considered high – aim for high in vitamins (A and C), minerals (calcium and iron) and fiber.

While not part of the Nutrition Facts Panel, its just as important to read the ingredients list.  Ingredients are listed in descending order by weight, so the first listed is the most prominent. This is where you want to look for allergens, added sugars, trans fats (partially hydrogenated oils), and additives and preservatives.

Okay, so now you know how to read the Nutrition Fact Panel, but here's the kicker: The majority of foods that require a label are highly processed and simply not good for you!  If you really want to eat healthier, choose more fresh fruits and vegetables or look for more “natural” items that have less than 5 items in the ingredients list.

Healthfully Yours,

Meghan
Monday, August 5, 2013

Super Easy "Super Foods"!


Unless you've been living under a rock for the last 10 years, I'm sure you've heard the term “super foods” being tossed around a lot (especially if you follow Dr. Oz), but what does that phrase really mean?

If you think about it, any food in its whole, natural form can be considered “super” in its own right: chicken for its protein, bananas for their potassium, beans for their fiber, etc. But when we say “super foods” we're referring to those that pack a little something extra!

In technical terms “super foods” (also referred to as functional foods) are foods, which contain physiologically active compounds that provide health benefits beyond their basic nutrients. This includes foods that are consumed in their natural form as well as those that have been purposely modified or fortified.

I thought I'd share my top five super foods that I consume on a regular basis. The best thing about these specific items is that you don't have to go to a specialty health store or learn any new cooking techniques to incorporate them into your diet. Chances are, these are foods you are already familiar with, so just bump up the consumption!

Meghan's Top 5 Super Foods:

  1. Greek Yogurt – I recommend Greek yogurt over regular yogurt, because it contains about twice as much protein, but what makes it “super” is the probiotics it contains. These bacteria are live active cultures, similar to the ones that already exist in our digestive tracts. They help maintain and restore the delicate balance of both "good" and "bad" bacteria necessary for a healthy digestive system. It's best to buy the plain version as the flavored or fruit added tend to be pretty high in sugar. Try Greek yogurt in a smoothie, as a sub for sour cream, or topped with fruit and granola.
  1. Wild Salmon – Salmon is a great source of lean protein, calcium, iron and vitamin D. If that wasn't “super” enough, it also contains omega-3 fatty acids, which have been shown to help with depression, heart conditions and inflammatory diseases such as arthritis. While wild salmon is more expensive than non-wild, the wild caught have higher omega-3 levels and are a more sustainable choice. I like to grill or bake salmon with a little olive oil, fresh herbs and spices.

  2. Blueberries – These sweet berries are “super” because they contain antioxidants called anthocyanins. Anthocyanins not only provide the bluish/purple color, but they may play a role in cancer prevention, prevention of cardiovascular diseases (including stroke) and neurodegenerative disorders of aging, such as Alzheimer’s disease. I prefer to eat blueberries all by themselves, but I also add them into smoothies, or enjoy them with some Greek yogurt, and of course, in pancakes!

  3. Walnuts - Already high in protein and fiber, these “super” nuts contain omega-3's and polyphenols both of which have been shown to reduce the risk of cardiovascular disease. In fact, a handful of walnuts contain more polyphenols than a glass of red wine! I like to snack on them plain, add them for crunch in my oatmeal or use them instead of pine nuts to make pesto. Just remember, 1 ounce, or about 14 walnut halves, contains 190 calories so watch your portions!

  4. Spinach - Spinach is a good source of vitamins A, K and folate, but just one cup of this “super” green contains about 3.6 mg of the antioxidants, lutein and zeaxanthin. Scientific evidence suggests that eating at least 6 mg a day of lutein and zeaxanthin may help reduce oxidative damage to the eye and lower the incidence of age-related macular degeneration. I enjoy spinach in my eggs, sauteed with a little garlic and on occasion, stuffed in pizza!

Healthfully Yours,

Meghan


Friday, July 12, 2013

Recipe Feature: Homemade Granola Bars


I read an article not too long ago about the top 10 worst foods you can feed your kids.  It of course included the obvious items like Lucky Charms Cereal and Twinkies, but I bet some would be surprised to see that granola bars were on the list!  The truth is, most granola bars on the market today are anything but healthy. Sure, some of them may be a “good source of whole grains”, but what they don't want you to know is all the sugar, oils, additives and preservatives they contain.

Not to pick on Quaker Oats here, but if you check out the list of ingredients in their Chewy Chocolate Chip Granola Bars you'll find this:

GRANOLA (WHOLE GRAIN ROLLED OATS, BROWN SUGAR, CRISP RICE [RICE FLOUR, SUGAR, SALT, MALTED BARLEY EXTRACT],WHOLE GRAIN ROLLED WHEAT, SOYBEAN OIL, DRIED COCONUT, WHOLE WHEAT FLOUR, SODIUM BICARBONATE, SOY LECITHIN, CARAMEL COLOR, NONFAT DRYMILK), SEMISWEET CHOCOLATE CHIPS (SUGAR, CHOCOLATE LIQUOR, COCOA BUTTER, SOY LECITHIN, VANILLA EXTRACT), CORN SYRUP, BROWN RICE CRISP (WHOLE GRAIN BROWN RICE, SUGAR, MALTED BARLEY FLOUR, SALT), INVERTSUGAR, SUGAR, CORN SYRUP SOLIDS, GLYCERIN, SOYBEAN OIL. CONTAINS 2% OR LESS OF SORBITOL,CALCIUM CARBONATE, SALT, WATER, SOY LECITHIN, MOLASSES, NATURAL AND ARTIFICIAL FLAVOR, BHT (PRESERVATIVE), CITRIC ACID.

Sugar is listed six different times and that doesn't even include the corn syrup! So what's a parent (or any concerned adult) to do you ask? Well, you can try to find a “healthier brand”, (although I looked and the Kashi brand granola bars aren't much better), or you can make your very own homemade granola bars! This recipe, courtesy of my friend Tera’s blog, is seriously amazing! I promise that you and your little ones will love them!


Homemade Granola Bars
from Honeymoon Kitchen
makes 12 bars or 24 squares
Ingredients
  • 1 cup roasted, unsalted almonds
  • 2 cups rolled oats
  • 3/4 cup wheat germ (I used ground flax seed instead)
  • 3/4 cup toasted, unsalted sunflower seeds
  • 2/3 cup brown sugar
  • 1/2 cup honey
  • 4 Tbsp coconut oil (butter would also work, if you don’t have coconut oil)
  • 2 tsp vanilla extract
  • 1/2 tsp cinnamon
  • 1/2 tsp salt
  • 1 1/2 cups dried fruit (I used a 50/50 mix of dried cranberries and raisins)
Preparation
  1. Preheat oven to 400 degrees.
  2. Crush your almonds by placing them in a zip lock baggie, putting the baggie between kitchen towels and crushing them with a mallet. You don’t want them pulverized, but don’t leave any whole.
  3. Combine almonds, oats, wheat germ and sunflower seeds in an 11×13 baking dish. Toast them in the oven for 12 minutes, stirring every few minutes to avoid burning them. Remove from oven and dump mixture into a big bowl. You can turn the oven off now – no more baking!
  4. Combine brown sugar, honey, coconut oil, vanilla, cinnamon and salt in a small sauce pan. Heat over medium heat, stirring constantly, until it comes to a simmer. If it’s taking a while and you get impatient, you can up the heat a smidge to medium-high. Simmer for one minute, stirring constantly, and remove from heat.
  5. Add fruit to bowl with grains and pour the liquid mixture over everything. Stir the mixture together VERY thoroughly so that the liquid “glue” gets on everything.
  6. Cut a piece of parchment that is twice as wide as your 11×13 baking dish. Place it in the dish with the extra hanging over the edges. Spray with nonstick spray. 
  7. Dump the granola mixture into the baking dish and spread it out with a spoon. Pull the extra parchment over the top of the granola and push down REALLY HARD to level the bars and compact them together.
     8.  Allow granola to cool at least 2-3 hours, or over night.     
     9.  Turn out onto a cutting board and cut into desired number of pieces.     

The granola bars freeze really well in plastic wrap and still taste great when thawed! Perfect for breakfast or a snack on the go, you will feel good about eating these!

 
Healthfully Yours,

Meghan